This post may contain affiliate links. Please see our disclosure policy.
This is a real showstopper: Sticky Japanese Pork Belly Noodles. It’s sweet, full of flavour and so impressive. It uses pork belly, a fatty cut of meat that really benefits from slow cooking as it softens the fat and makes the cut meltingly tender and not tough at all. The dish takes a few hours to cook but the hands-on time is very minimal. It’s one of those where you put it in the oven and forget about it.
Slow cooking meat is such a good option when you’re entertaining. It’s so easy, requires zero skill, and yet people are always completely, disproportionately impressed and astounded by the results. This also reheats very well and is great to make the day before so you can get ahead.
Table of Contents
Why You’ll Love This Recipe
- It’s very hands-off – you add everything together and leave it to do its thing in the oven.
- Slow-cooking pork belly is super forgiving as it gets better with time. There’s pretty much no risk of overcooking it.
- The flavours are so delicious and coat the noodles perfectly with fresh ginger, soy and sweet brown sugar.
Ingredients
See recipe card for the exact recipe with a full list of ingredients and measurements.
Skin on pork belly – you need 1kg roughly, so it’s usually easier to get this from the butchers if you can, as supermarket cuts are usually a bit smaller and definitely don’t have as good a flavour either.
Spring onion – this goes into the pan with the pork belly to infuse with allium flavour.
Fresh ginger – you need this both at first stage when roasting and also when making the sticky sauce. Using a microplane grater is great when making the sauce as it makes the ginger so small it melts into the sauce.
Fresh garlic – I find 1 clove is perfect in the sauce but if you love garlic, feel free to add more.
Red chilli – the heat here is really welcome in this sweet sauce but if you really can’t handle heat, you can omit.
Lemongrass – a fragrant root that is typical in many Asian cuisines. It’s fragrant and almost floral, with a hint of ginger. This goes into the stock.
Honey – this adds sweetness to the sauce and helps achieve the ‘sticky’ texture. This ensures it coats the noodles well.
Noodles – use whatever noodles you like. I like egg noodles but rice noodles or even Udon would be good.
Soy sauce – forms the base of the sticky sauce and adds great umami flavour to the dish.
Soft brown sugar – this thickens the sauce and also is what adds the glazed, sticky element so it coats the pork belly noodles and chunks.
Substitutions and Variations
Pork belly – You could use a pork shoulder instead but pork belly is ideal as it’s so fatty. You could also sub in pork ribs. Roast them initially then don’t cut them up obviously. You can then toss them in the sticky sauce at the end and they would be so good.
Honey/brown sugar – if you don’t have both, just use one and substitute the amounts directly.
Noodles – obviously this recipe is for pork belly noodles but this is also delicious served with rice, either sticky rice or fluffy basmati rice.
Here’s how to make Pork Belly Noodles
This is a simple step-by-step guide to help you make this easy noodle dish. As usual, the full recipe is below in the recipe card at the bottom of the page.

ONE: Heat the oil in a frying pan and once it’s nice and hot, place the whole pork belly in the pan skin side down. Once golden, turn it over and sear on the other sides too.

TWO: Put the seared pork belly, still whole, into a heavy bottomed pan with a lid. Cover with water and add the spring onion, ginger, lemongrass and red chilli. Bring to the boil and then reduce to a simmer with the lid on for about 2 hours.

THREE: Mix together the oil, soy sauce, honey, brown sugar, garlic, and ginger.

FOUR: Once mixed, set aside. Remove the pork belly from the liquid and leave to cool enough for you to chop it up, into roughly 2 inch chunks.

FIVE: Heat a frying pan with a little oil and then add your pork belly cubes. Fry for a few minutes until they have turned golden and the skin is looking crispy.

SIX: Now pour the sticky sauce into the pan and cook for another 2 minutes.

SEVEN: Make sure to keep stirring as you don’t want it to burn or caramelise. The pork should look gorgeously golden and sticky. Get the noodles on to boil.

EIGHT: Add the julienned carrots to the noodles 1 minute before they finish cooking and then toss the cooked noodles and carrots with a few spoons from the pork sauce to make them nice and saucy.
Cooking Tips
Slow-cooking pork – Don’t overthink this. It’s very hard to mess up as it’s poached so you basically cannot overcook it. Let it poach for around 2 hours and then you just chunk it up and fry until golden.
Cooking the noodles – You could also boil the noodles in the poaching stock in which the pork was cooked. Then I like to toss the noodles once cooked in the sticky sauce to coat each noodle.
Avoid burning the sauce – When you add the sticky sauce to the pork in the frying pan, keep the heat over medium or medium-high. Don’t cook over high heat as the sugar and the honey can burn quickly.
If you don’t have a julienne peeler – for the carrots, you could use a vegetable peeler to create ribbons or a grater even. Or use a knife.
Frequently Asked Questions
Noodles work well here, I toss the noodles into the sticky sauce that also coats the pork belly chunks so they are saucy too. Otherwise, I think these would be great in a bao bun. Add a quick slaw alongside and it would be so delicious.
Yes, you could make poached pork belly the day before. Cube up and then cover then leave to cool in the fridge overnight. Then continue from step 4, reheating it gently in the sticky sauce.
Any leftover pork can be transferred to an airtight container and kept in the fridge for up to 3 days. Noodles can also be kept for a few days in the fridge.
If you’ve made this ahead of time, see above for how to reheat. If reheating leftovers, blast in the microwave for 2 minutes or so until piping hot.
You can’t freeze the noodles but you can freeze the sticky pork belly. Freeze for up to 2 months. Then when ready to eat, thaw overnight and then reheat in a frying pan over medium-high heat with a splash of water to loosen the sauce.
More recipes you might enjoy
If you like these sticky pork belly noodles, try my Teriyaki Salmon Rice Bowl with Spicy Mango Salsa, Spicy Korean-inspired Gochujang Fishcakes or my Spicy Honey Salmon Bowls with Coconut Rice. These Thai-inspired Sesame Fish Cakes or Duck Bao Buns are also delicious.

Easy Dinner Recipes
Air Fryer Pork Belly

Weeknight Supper
Quick and Easy Shin Ramen with Crispy Pork

Lunch Recipes
Mason Jar Noodles

Less Than 20 Minutes
Korean Spicy Ramen Noodles with Cheese
Made this recipe and loved it?
I would love love LOVE if you could leave a review in the comments… I love hearing what you thought, any changes you made, the stories behind what made you try my recipes. Also, if you share a photo on instagram, please tag me @desertislanddishes, it makes my day to see you making my creations!

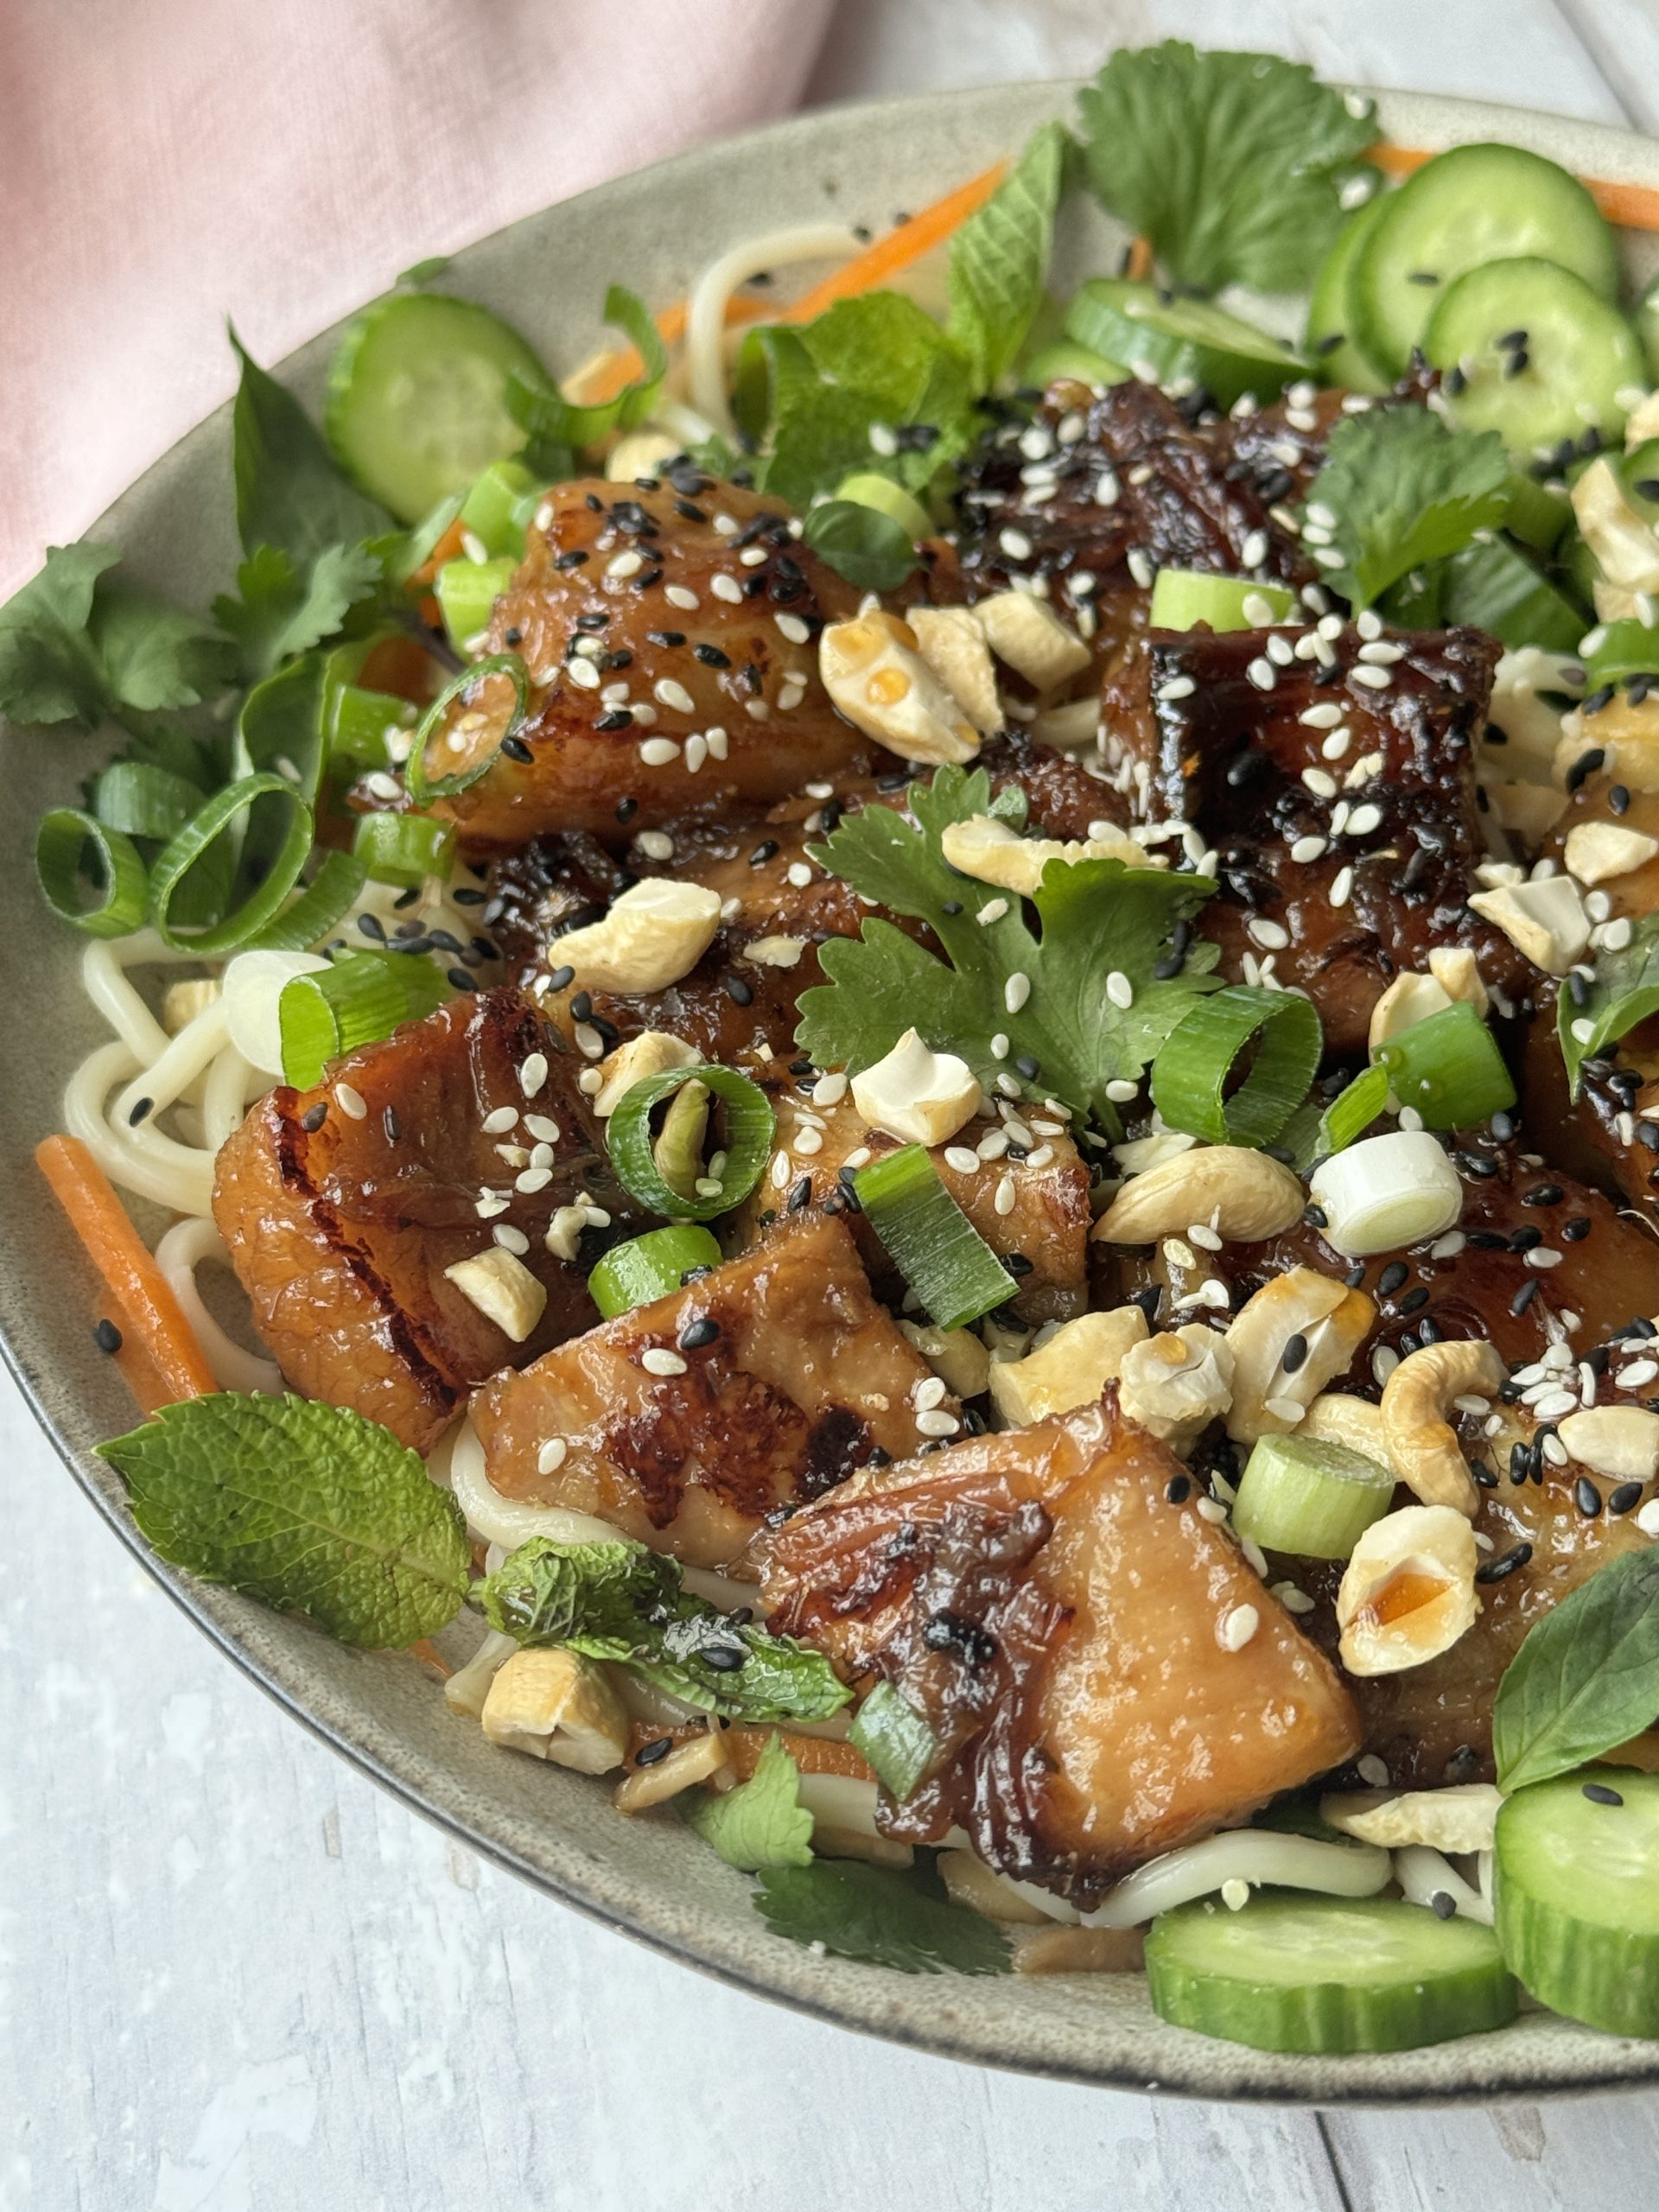
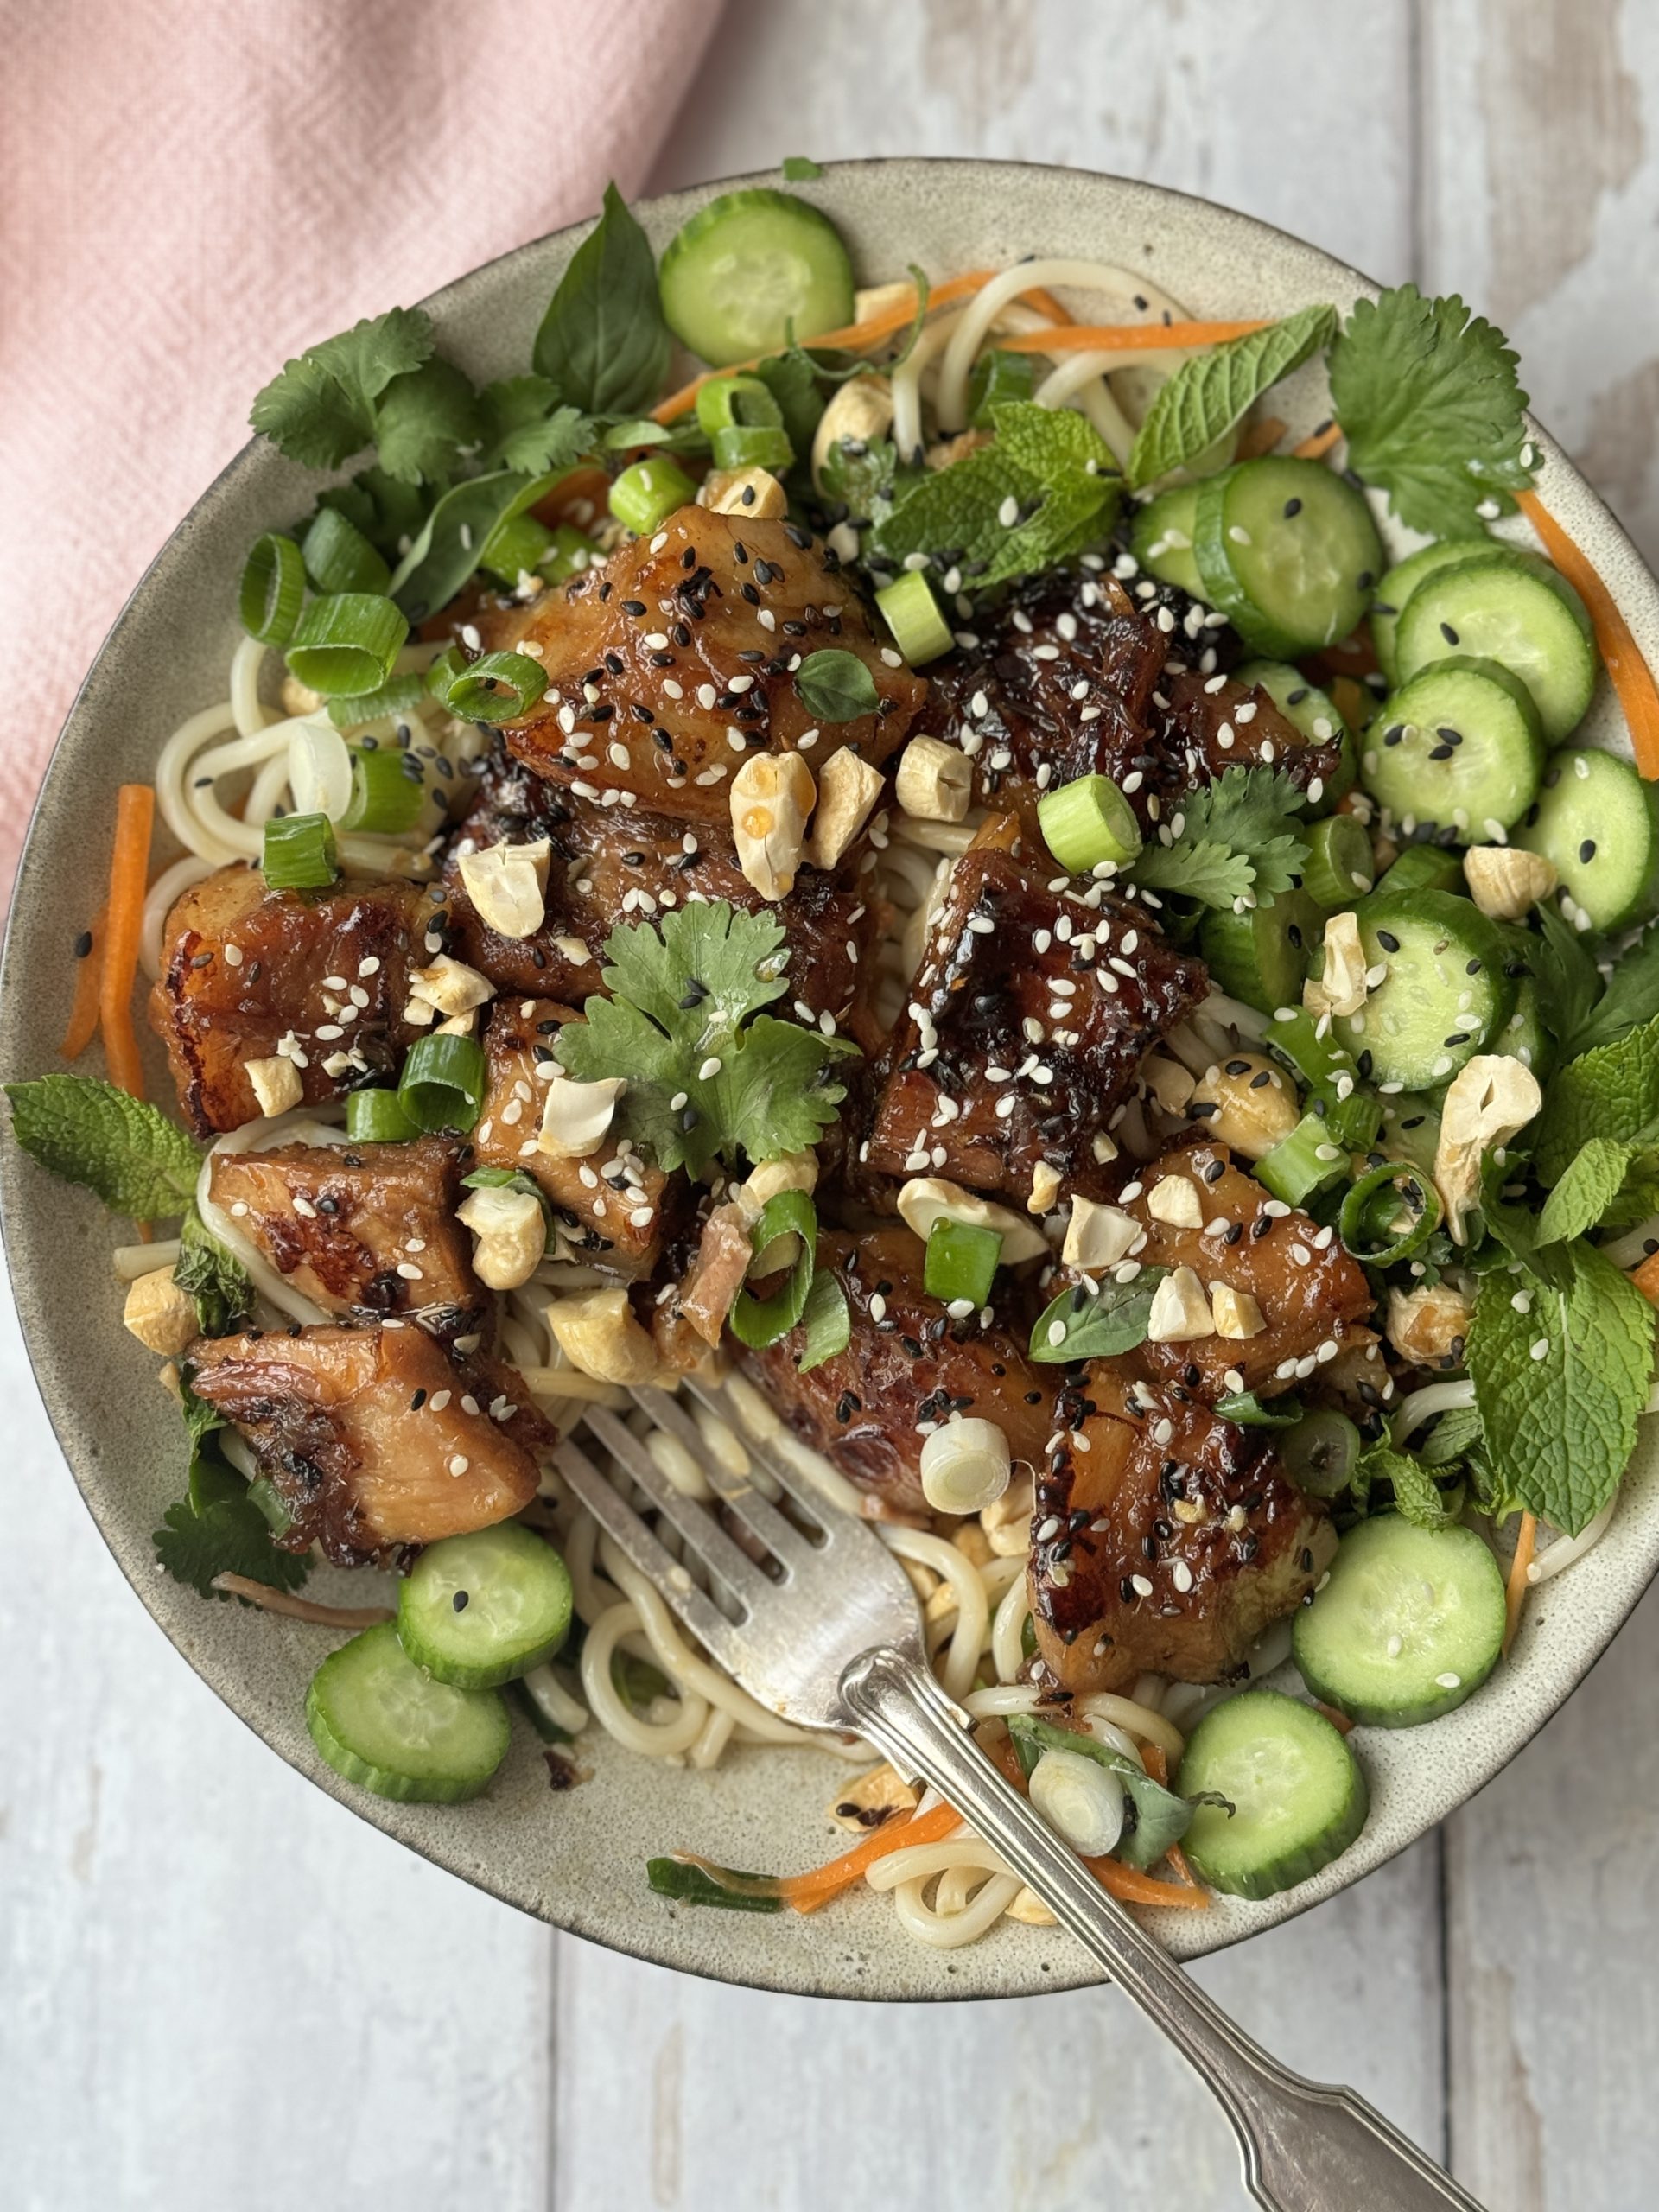
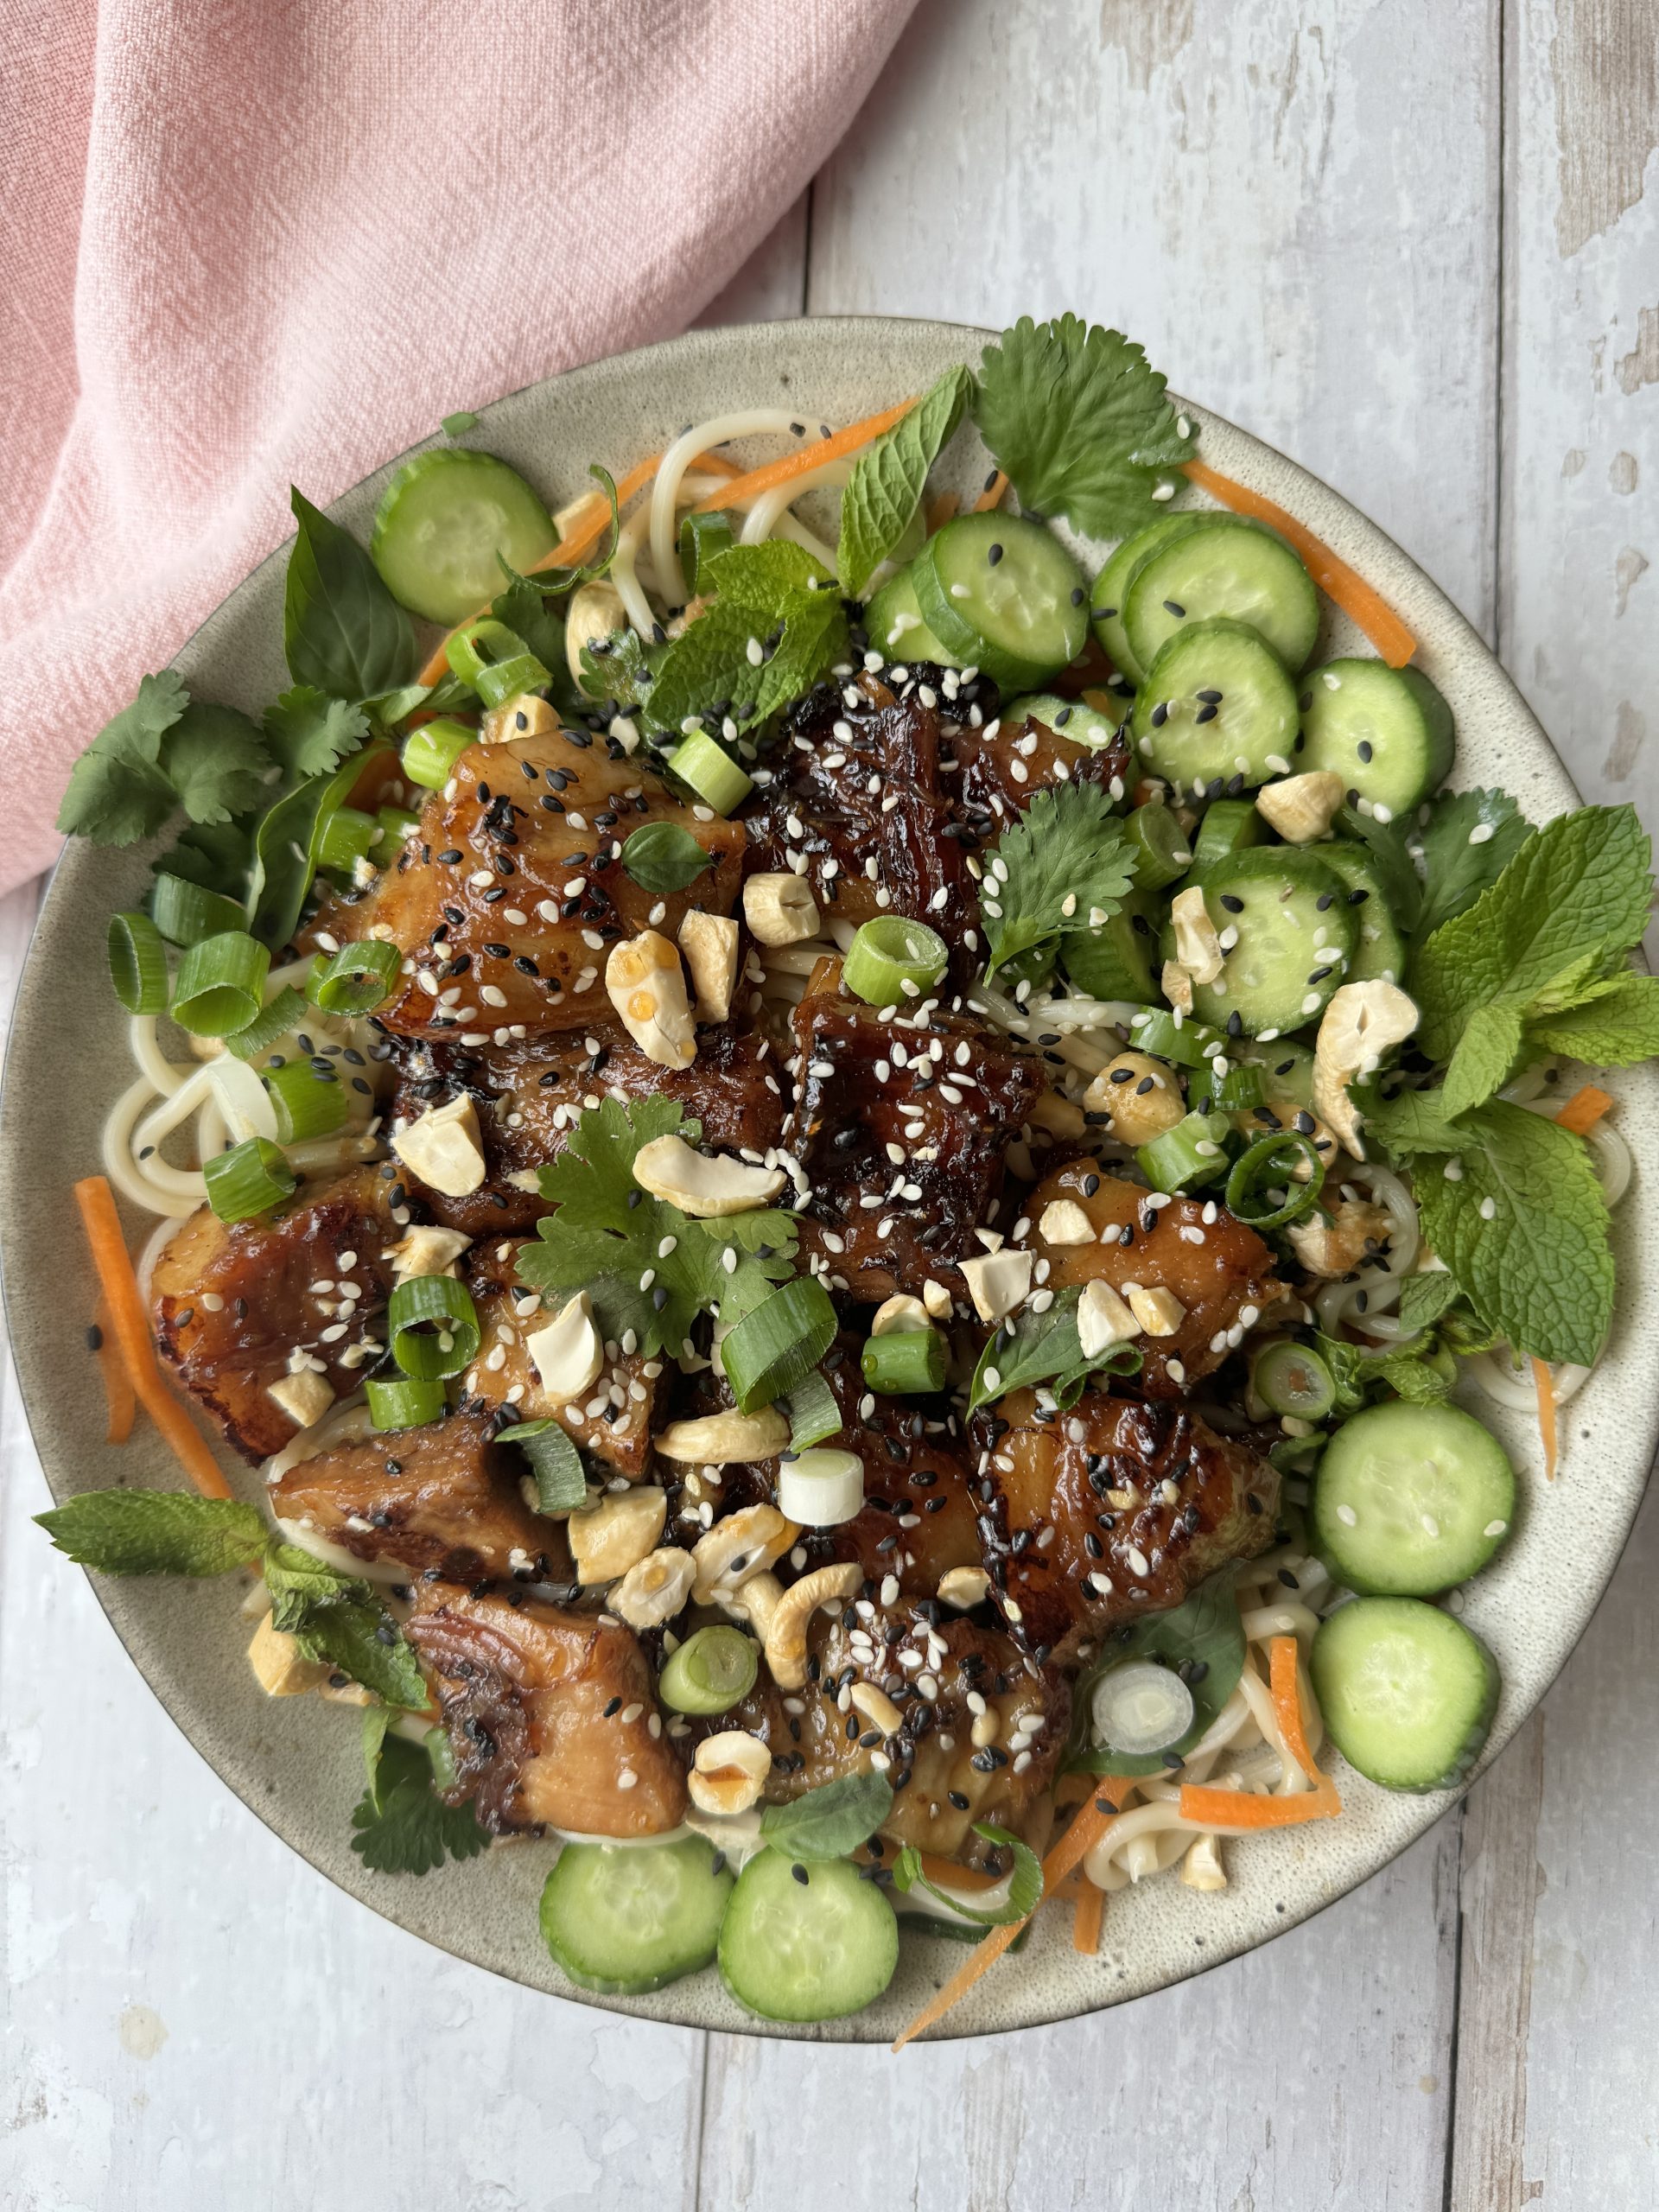
Japanese Braised Sticky Pork Belly Noodles
Ingredients
For the initial sear and simmer:
- 1 kg pork belly with the skin on
- 1 tbsp olive oil
- 2 spring onions, roughly chopped in half
- 1 inch ginger, peeled, and roughly chopped
- 1/2 red chilli, roughly chopped
- 2 sticks of lemongrass
For the sticky sauce:
- 1 tbsp vegetable oil
- 2 tbsp honey
- 1 tbsp soft brown sugar
- 3 tbsp soy sauce
- 1 clove garlic, grated
- 1 inch ginger, grated
To serve:
- 1 carrot, julienned into thin ribbons
- Egg noodles: 1 nest per person
- 2 x sliced baby cucumber
- sprinkling of sesame seeds, roughly chopped cashew nuts, sliced red chilli and spring onion, for garnish
Instructions
- Heat the oil in a frying pan over medium-high and once it’s nice and hot, place the whole pork belly in the pan skin side down. Once golden, turn it over and sear on the other sides too. The idea is just to get a lovely colour, but you aren’t focusing on cooking the meat at all.
- Put the seared pork belly, still whole, into a heavy bottomed pan with a lid. Cover with water and add the spring onion, ginger, lemongrass and red chilli. Bring to the boil and then reduce to a simmer with the lid on for about 2 hours. During this time, skim off any fat that floats to the surface.
- Remove the pork belly from the liquid and leave to cool enough for you to chop it up, into roughly 2 inch chunks.
- Mix together the oil, soy sauce, honey, brown sugar, ginger and garlic.
- Heat a frying pan over medium-high with a little oil and then add your pork belly cubes. Fry for a few minutes until they have turned golden and the skin is looking crispy.
- Now pour the sticky sauce into the pan and cook for another 2 minutes, making sure to keep stirring as you don’t want it to burn or caramelise. The pork should look gorgeously golden and sticky. Meanwhile, get your noodles on to boil, according to package instructions.
- Add the julienned carrots to the noodles 1 minute before they finish cooking and then toss the cooked noodles and carrots with a few spoons from the pork sauce to make them nice and saucy.
- Serve with sliced cucumber. Sprinkle over some fresh chopped chilli, some spring onions and sesame seeds.


Made this last night and it was delicious! I added Pam Choi and some other veg to bulk it out a bit but the sauce was dreamy and my 4 year old loved it too! (Sans chilli!)